Classes

Thursday, July 28, 2011

3D Art: Contact Paper and Construction Paper Strips


This was one of the most fun activities I have ever done with children. It was exhilarating to observe this group of three four year old girls as they navigated a new concept, inspiring each other with ideas and building upon what they had learned from observing their work.


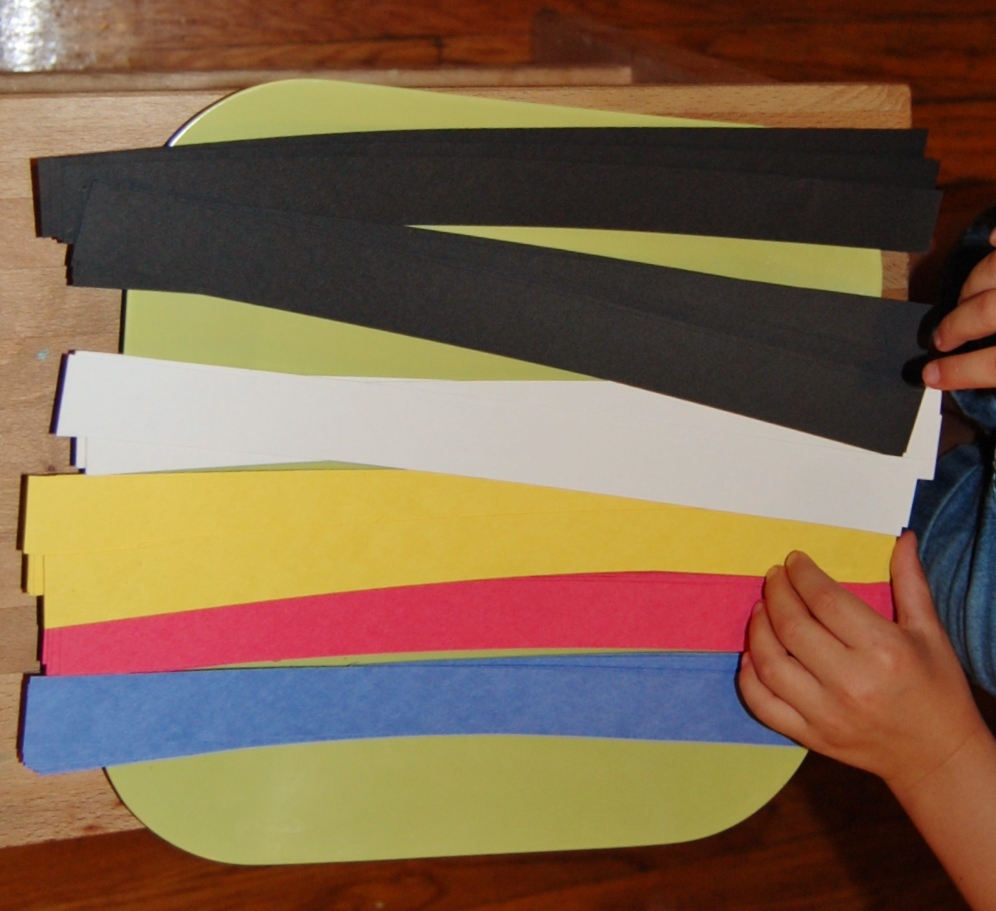
I laid out a large piece of contact paper on our art table with one inch strips of construction paper. I chose colors that reminded me of Joan Miro's work: red, black, white, yellow and blue. Back in the fall we had been very inspired by the book Yellow Square, and explored 3D art with different shapes of paper, folded and cut in interesting ways.
Previous Fall Project: Shapes and Glue over Recycled Book Cover


 We began by re-reading the book. They were as interested in it as they had been in the fall. I then introduced the activity by talking about how we usually work with collage materials and contact paper on a flat surface or in 2D. I explained this time we were going to use the strips of paper and shape them so they would stay up, creating a 3D piece. I demonstrated how this could be done with a simple upside down "U" shape as an example.


As soon as they set themselves to work one of them figured out how to make a circle.

And they were off, immersed in a rhythm of creativity that gave me goose bumps! Circles were being weaved into balls. Paper was being bent into different shapes. Narration was gaining momentum, with comparisons to playgrounds with slides and structures. Even geometry made its way in, with references to straight lines and curves, pointy angles and circles.


Finally, as impetuous as they had been while at work, full of concentration, inspiration and creativity, and without one dispute(!), the three artists knew they were done and quietly moved on to pretend play. As for this observer, I was left with eyes wide open for the wonderful piece of art created in front of me and in awe of the magic of creativity in childhood.

Friday, July 15, 2011

Bubble Painting


This week we tried out painting by blowing bubbles. I mixed some dish-washing liquid, water and a little glycerin into small bowls and added about a teaspoon of paint. I found these bubble solution recipes that might come in handy for those who need more accurate proportions... I usually just play it by ear.
I then hunted around the house for any wands or blowers I could find.


We then headed outside with trays and sturdy white construction paper and just started blowing bubbles!
The artists ranged in age, from 4 to 10, and all enjoyed the activity equally.
Some of the wands made bigger bubbles that ended as larger circles on the paper.


While others made smaller bubbles clustered together, filled with color.


The afternoon was filled with wonder and delight, squeaks and laughter, and was the best way to stay cool on a hot and humid day. Next time I hope to try it out with larger cylinders and wands, and see what giant bubbles look like on a large piece of paper.